Oracle Database XE, APEX, ORDS, Tomcat and httpd on CentOS 7: all-in-one guide - part three
The third part of the step-by-step all-in-one guide on how to install a full APEX environment on CentOS. It covers some additional steps to improve your experience and security when use APEX.


This is the third chapter of this all-in-one guide, covering some additional configuration of the environment. By now, you should already have a working installation of Oracle Database XE, APEX, ORDS, Tomcat and Apache httpd on your CentOS system without proceeding to these steps at all. But when it comes to a production environment, there are always security and performance issues which arise. And if you want to improve these aspects of your setup, keep reading.
SSHd tweaks
It is a good idea to disable direct remote root login. Users which need super user rights, should be able to escalate their rights instead using su command. To do so, edit the SSHd config and reload it:
mcedit /etc/ssh/sshd_config
Add a line as below to the config and save the file
PermitRootLogin no
Then, restart the service:
systemctl restart sshd
Apache httpd tweaks
First, disable the default welcome page by removing the corresponding config file:
rm -rf /etc/httpd/conf.d/welcome.conf
Then, add an additional configuration file 0-extra.conf in the etc/httpd/conf.d/ directory with the contents as below:
# additional apache httpd configuration
# add this to the end of /etc/httpd/conf/httpd.conf
# or put it in a separate file such as /etc/httpd/conf.d/0-extra.conf

# disable sensitive version info
ServerSignature Off
ServerTokens Prod

# enable compression of static content
<IfModule deflate_module>
     SetOutputFilter DEFLATE
     AddOutputFilterByType DEFLATE text/plain text/html text/xml text/css text/javascript
</IfModule>

# enable client caching of static content
<IfModule expires_module>
    ExpiresActive On
    ExpiresByType image/gif "access plus 7 days"
    ExpiresByType image/jpeg "access plus 7 days"
    ExpiresByType image/png "access plus 7 days"
    ExpiresByType text/css "access plus 7 days"
    ExpiresByType text/javascript "access plus 7 days"
    ExpiresByType application/javascript "access plus 7 days"
    ExpiresByType application/x-javascript "access plus 7 days"
</IfModule>
This will enable traffic compression and client-side static files caching. On the other hand, it will disable displaying of the sensitive version data.
Tomcat tweaks
If you followed the steps from this guide, there's nothing to clean up in Tomcat. But, just to be sure, you can execute these command which are intended to remove all default Tomcat applications:
cd /usr/share/tomcat/webapps
rm -rf examples/*
rmdir examples
rm -rf sample/*
rmdir sample
Then, I noticed that despite the fact both tomcat and oracle-xe-18c start on the system startup, APEX does not properly work without restarting of tomcat. This happens because the tomcat service starts before the oracle-xe-18c. To fix this, we need to edit the Tomcat service systemd unit file:
mcedit /usr/lib/systemd/system/tomcat.service
There the Unit section should look like this:
[Unit]
Description=Apache Tomcat Web Application Container
After=syslog.target network.target oracle-xe-18c.service
Wants=oracle-xe-18c.service
Save the file after making changes and invoke this command to reload the config:
systemctl daemon-reload
Oracle XE tweaks
Now let's connect to the database using sqlplus /nolog command, clean it up and make some additional configuration. Notice the fact that we are going to use bequeath connection here, because we will need to restart the database instance once:
-- connect to the CDB database to perform system-wide configuration
connect sys as sysdba

-- memory parameters for the instance
-- notice the fact that we are using the maximum allowed memory size for XE
-- so, please, tweak these values in case you do not have such amounts of memory for the RDBMS (otherwise, your instance won't start)
-- also notice that we are using AMM (Automatic Memory Management)
alter system set memory_target=2G scope=spfile;
alter system set memory_max_target=2G scope=spfile;
alter system set sga_target=0 scope=spfile;
alter system set pga_aggregate_target=0 scope=spfile;

-- some recommended values for the maximum number of sessions, processes and job_queues
alter system set sessions=250 scope=spfile;
alter system set processes=500 scope=spfile;
alter system set job_queue_processes=100 scope=spfile;

-- restart database
shutdown immediate
startup

-- now change session to use PDB to configure other things
alter session set container = xepdb1;

-- anonymous user is not needed when we don't use XDB
alter user anonymous account lock;

-- dropping the demo schema
drop user hr cascade;

-- altering the default password policy (by default passwords will expire in 180 days)
alter profile default limit password_life_time unlimited;

-- creating a tablespace for our APEX workspaces
create tablespace apex datafile '/opt/oracle/oradata/XE/XEPDB1/apex.dbf' size 128M reuse autoextend on next 8M maxsize unlimited;

-- creating a schema for our APEX workspaces
create user apex identified by "YourPasswordHere" default tablespace apex temporary tablespace temp;
alter user apex quota unlimited on apex;
grant unlimited tablespace to apex;
grant create session to apex;
grant create cluster to apex;
grant create dimension to apex;
grant create indextype to apex;
grant create job to apex;
grant create materialized view to apex;
grant create operator to apex;
grant create procedure to apex;
grant create sequence to apex;
grant create snapshot to apex;
grant create synonym to apex;
grant create table to apex;
grant create trigger to apex;
grant create type to apex;
grant create view to apex;

exit
As you can see, I created a new schema apex in a new tablespace apex. I would recommend to use it for your APEX applications.
ORDS tweaks
The default connection pool settings in the ORDS configuration are too small. You'll have to experiment to see what settings are the best for your workload, but the following seem to work well:
mcedit /opt/oracle/ords/config/ords/conf/apex.xml
Find these parameters and set their values (or add these lines if they do not exist):
<entry key="jdbc.InitialLimit">10</entry>
<entry key="jdbc.MinLimit">10</entry>
<entry key="jdbc.MaxLimit">60</entry>
Restart Tomcat to take effect:
systemctl restart tomcat
Checking if everything works
I believe you are dying to open your browser and check how it works. Just do it!

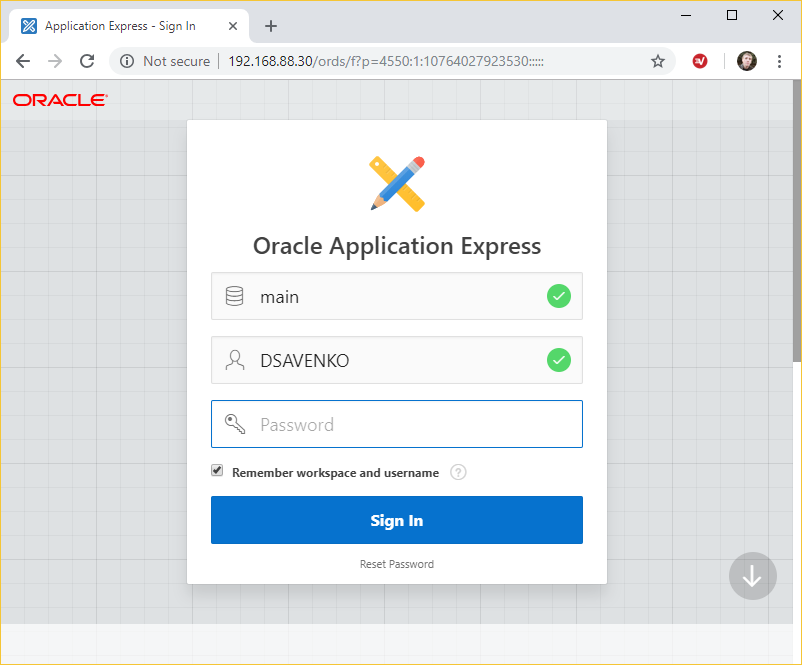
APEX main page must be available on yourdomain.tld/ords address, APEX administration services on yourdomain.tld/ords/apex_admin respectively (where yourdomain.tld is your domain name or the server IP address):
Let's check the headers to be sure that caching and traffic compression work:
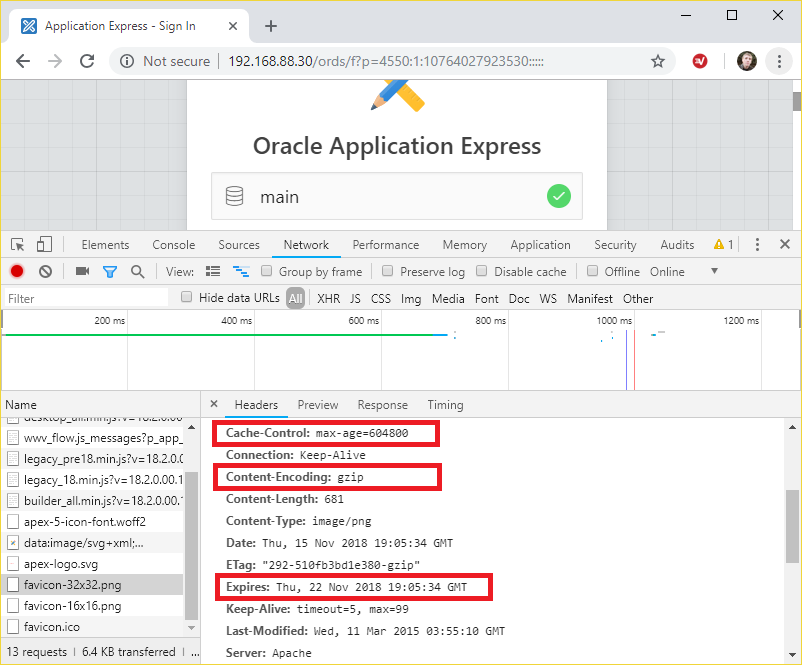
Everything looks wonderful!
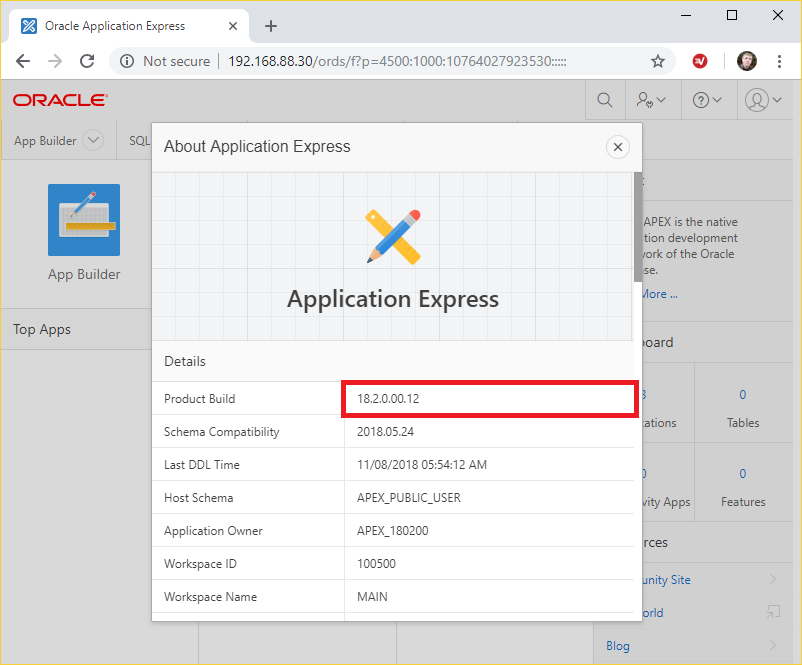
And as you can see, we use the latest current version of APEX.
Conclusion
Surely, these are not all the steps which could be done. Consider also setting up SSL connection to your server, configuring backups, installing some monitoring tools and systems like influxdb+telegraf+grafana. If you like to know about these things, step further to the final part of the guide
But I am already can say that we successfully installed and secured a reliable, nicely working APEX environment on a CentOS Linux server. Please, provide me with your feedback in the comments and do not hesitate to add anything, which would be great to add to this guide. I would really appreciate it if you corrected my English if I misused some words or structures - I should excuse myself for it in advance.
Thank you very much for reading and I wonder if this series of blog posts would do any better to the great APEX community. Stay tuned for other guides and stories!
Next chapters
Here we started with some additional configuration, but if you are ready for SSL, redundancy and backups, you are welcome to check out the final part of the guide/
Here is the link for your convenience:
Previous chapters
In case you missed some previous steps, please, use the following links to catch up: