Configure Ghost to use Yandex.Mail for Domain
A How-To instruction to configure Ghost blogging platform to use Yandex mail for a domain service

In this article we are going to sort out how to configure Ghost to use any custom SMTP server and as a good example of it, we will be using Yandex's mail for a domain service.
Ghost blogging platform tries to use Direct Mail service by default. But what if you want to use something different? Official documentation lacks this information - at the moment I am composing this post, it only explains how to configure a popular service such as Mailgun or Amazon SES as Ghost's mail transport. There's nothing wrong in usage of these services, but they still have some limitations, and second - it is not always suitable for the blog owner.
Motivation
You may want to use a custom SMTP server for Ghost because of many reasons. It could be Postfix which is hosted on a different computer in your office, or you may already pay for a great email service and want to get all out of it. All these options are configurable in Ghost.
Though, I intentionally refused to use my own Postfix or exim server. Firstly - because configuration of a mail server is a big pain in the neck (still remember my first time with sendmail, it was just a nightmare), and secondly due to the fact that it's impossible to finish its configuration - you permanently need to add new anti-spam filters and services, you have to watch if the IP-address of your mail server is not in black lists and so on.
That's why I went for Yandex.Mail for Domain server. For those who do not know, Yandex is a russian alternative to Google and it provides the same set of services and even more (unfortunately, some of them are available only in russian). Quality of the services is outstanding, Mail for Domain is not an exception - their anti-spam filters work awesome, and you don't need to worry about any black lists (in case you're not a spammer of course). Yandex, actually, also gives an opportunity to host domain names, but this is optional.
Step 1. Register a Yandex account
The first thing to be done is to register a Yandex account. Just follow the link https://passport.yandex.com/registration/ to achieve this.
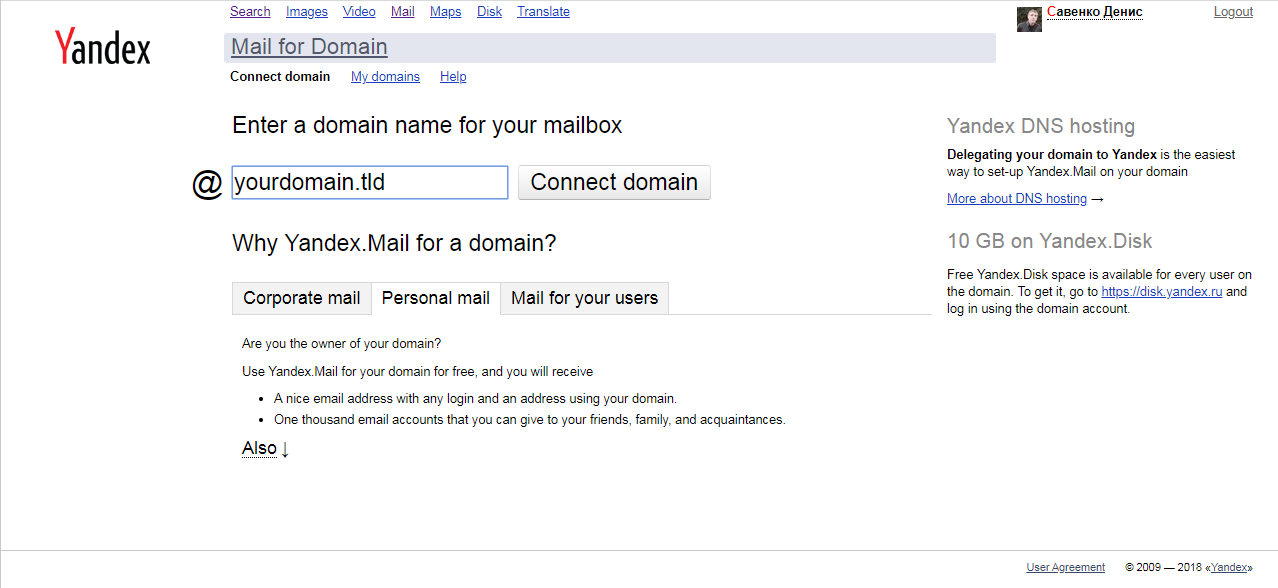
Step 2. Connect your domain to Yandex.Mail and verify your ownage of it
Open the service page and enter your domain name in the field.
The next step is to verify that you are the owner of the domain. There are three options given how to do so, but I find adding a CNAME record the easiest way.
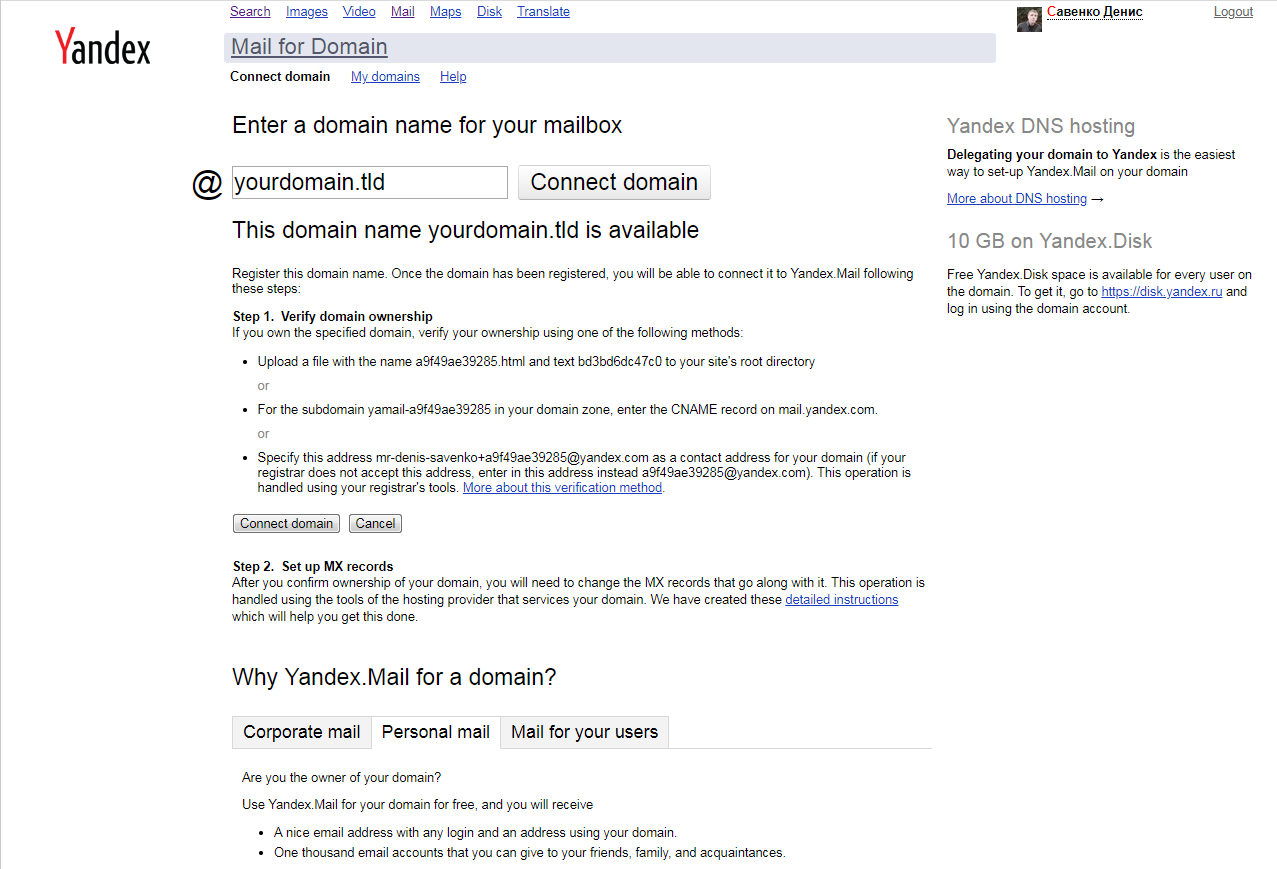
Now, following the instruction, you need to add the MX record mx.yandex.net. for your domain.
Step 3. Adding a mailbox
After you verified ownage of your domain, you're able to add as many mailboxes as you want. Add at least one and set a password for it to use it from Ghost.
Step 4. Setting up additional DNS records for better experience (optional)
In order to improve delivery rate of letters from your mailboxes, it is a good idea to add some additional SPF and DKIM signature records for your domain. Also, if you are planning to use web interface to check your mail, you can set up a corresponding CNAME record.
Step 5. Configuring Ghost to use Yandex.Mail
Now you are done with the mail service and the only thing which left is to add it to Ghost configuration. To do so, go to the directory where you installed Ghost (usually /var/www/ghost/) and change the mail section of your config.production.json like this:
  "mail": {
    "from": "user@yourdomain.tld",
    "transport": "SMTP",
    "options": {
      "host": "smtp.yandex.ru",
      "port": 587,
      "auth": {
        "user": "user@yourdomain.tld",
        "pass": "YourPasswordHere"
      }
    }
  },
Here user@yourdomain.tld is the name of the mailbox you added in step 3 of this instruction. Save the configuration file after editing and restart Ghost service.
That's it! From now Ghost will use Yandex.Mail for Domain. Stay tuned!